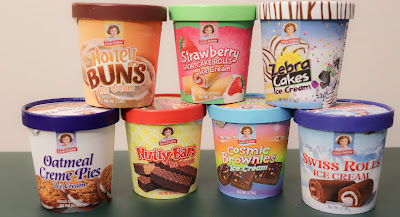
Honey Buns:
This is the one I was honestly looking forward to the most. The ice cream consists of what tastes like a vanilla base with little donut pieces and a swirl of cinnamon sugar. This is the only one that I thought might be too sweet. The donut pieces are a little tougher than I expected, but are still good. The swirl has a surprising amount of nutmeg flavor and I love it.
4/5
Strawberry Shortcake Rolls:
Probably the best one here and a really solid ice cream. The vanilla base is perfectly complimented by a sharp strawberry creme swirl. The little pieces of shortcake are a great texture contrast. It is a surprisingly adult flavor, not too sweet at all.
5/5
Zebra Cakes:
Again, I was really looking forward to this one, and it was honestly the most disappointing one here. Surprisingly bland with cake pieces and a little ribbon of chocolate. Honestly the one I am least likely to finish.
2.5/5
Oatmeal Creme Pies:
The only other disappointing one. Seems like it is just vanilla ice cream with cookie pieces, and there are not enough cookie pieces for it to just be that. The pieces are nice and chewy and soft, like you would expect.
3/5
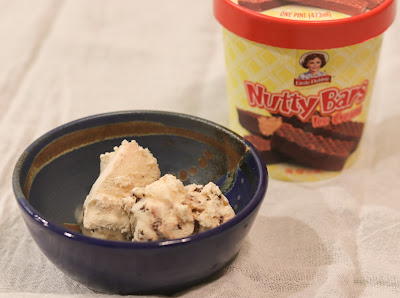
Nutty Bars:
Pretty much rocky road. A vanilla base with peanut swirl and chocolate covered ice cream cone pieces. really solid. I wish it had more peanut in it, like a peanut butter ice cream base, but it's a really great expression of this snack as an ice cream.
4.5/5
Cosmic Brownies:
Another one that they just nailed! Chocolate ice cream, the iconic sprinkles, and brownie pieces. Surprisingly, it is not an overwhelmingly sweet ice cream. If you like cosmic brownies, this one will perfectly hit that itch.
4.5/5
Swiss Rolls:
Again, a solid chocolate ice cream. Not too sweet and really well balanced. The marshmallow swirl and cake pieces are a fantastic emulation of the snack cake. Marshmallow is not personally a preferred flavor of mine, but I cannot fault them on execution.
3.5/5
Altogether, a surprisingly great collection of ice creams for such a limited run event. I honestly hope they sell well enough to keep them going, or to encourage other manufactures to throw their hats into the ring. If you can find them, try them. I do not think you will be disappointed.


